Enrich your design: leaflet printing from Solopress

Showing posts with label Tutorials. Show all posts

22 November 2012

Anaglyph 3D Photography and Film

It’s been a while since we’ve posted something on Inspiring Print so I thought I’d share a recent purchase of mine with you that brings an old form of visual entertainment into the current day.

Last week I was having a browse through Flickr to learn from other peoples’ impressive photos by studying the EXIF data of those that had it available. I learn to shoot a lot of different styles with my DSLR by studying photos and how they were put together before playing with the settings and adding my own twist.

As I was searching I came across several 3D images that needed a pair of glasses with a red lens and a cyan lens, otherwise known as anaglyph 3D glasses, in order to appreciate the 3D effect. In true spontaneous style I jumped onto eBay and ordered myself a pair of them – 2 pairs for £2.


Since they arrived today I have spent a good portion of the morning looking at the different types of 3D images that are on Flickr and videos that have been uploaded to YouTube and Vimeo using this anaglyph style of 3D image recording.

Overall I am impressed at the wealth of material available to admire online, considering that 3D viewing of this kind went out of fashion for a while until Real D came into cinemas with their polarization systems, which you’ve undoubtedly used within the past 5 years if you have watched a 3D film in the cinema wearing passive glasses.


There is one major problem with the anaglyph glasses though and that is that the colouration of your picture isn’t as true as it would be using a pair of Real D’s polarised glasses because of the different coloured lenses. On the other hand, you do need a 3D source such as a 3D monitor or cinema screen in order to benefit from using the passive polarised lenses, therefore, if you’d like to create a 3D video that is viewable through all devices then anaglyph is the only way to go for now.


5 Cool 3D Photos

If you’re fortunate enough to have a pair of your own anaglyph glasses then have them at the ready as I show you five of the most impressive 3D photos I’ve come across today on Flickr.

1. A telegraph pole that looks real enough you could climb it:
http://www.flickr.com/photos/parallel_yoshing/4435473954/sizes/z/in/photostream/

2. All aboard the HMS Victory, you can almost smell the sea air:
http://www.flickr.com/photos/stereoviews/4671782299/sizes/z/in/photostream/

3. Take a trip to the Thames and see the London Eye from the comfort of your armchair:
http://www.flickr.com/photos/stereoviews/4468225752/sizes/z/in/photostream/

4. Feel the warmth of a big bonfire through your red and blue glasses:
http://www.flickr.com/photos/stereoviews/4429479321/sizes/z/in/photostream/

5. Be careful not to roll down this wicked spiral staircase as you peer into the concrete tornado:
http://www.flickr.com/photos/stereoviews/5050067331/sizes/z/in/photostream/

Anaglyph 3D Videos

After looking at 3D photos I decided to spend a little time on Vimeo to find an impressive 3D video that I could share with you. This one of some robots playing football was the best one I came across:


There are plenty of others to watch, however, you will notice if you browse for yourself with a pair of these glasses that video quality is an important factor in the success of the 3D effect – the sharper the better. Pixelated videos just look like a mess, twice!


DIY 3D Anaglyph Images/ Video

There are a bunch of lenses and cameras on the market that you can buy to achieve this type of 3D image or video (Amazon: http://amzn.to/UUvH8d), however, there are tutorials available to teach you how to make your own 3D anaglyph images using one camera.


http://www.flickr.com/photos/sklathill/450378602/sizes/z/in/photostream/

It is preferred that the subject you are taking a photo of is stationary to make the 3D effect work. The process involves taking two photos (one from a left eye perspective, the other from a right eye), which can be offset from one another using a software package like Photoshop and involves further editing. You will of course need to be wearing your red and blue glasses whilst constructing it.

A handy tutorial to learn this from can be found here: http://www.diyphotography.net/create-3d-anaglyph-images. Judging by the author’s 3D image portfolio, this tutorial should be a simple method that provides you with tight and impressive 3D results.

All in all I’ve enjoyed my little trip down memory lane to when I remember being a young one and using the paper version of these glasses at my local cinema. I am pleased that this has improved with the help of Real D though because of the colouration issue.

I will be trying the DIY tutorial in an attempt to create my own 3D photo, which I will post on here if successful. Tweet us your own attempts if you decide to at @inspiringprint.

8 October 2012

Getting to Grips With Adobe Illustrator

This week I began playing with AI to transfer my paper illustrations to PC - yes PC not Mac (maybe a Mac one day when I have the dough). I've been getting my head around the various tools it has to give my work justice, which has meant reading plenty of tutorials online and following them to see how each of the different functions works. It's been fun to say the least but it takes some patience and getting used to.

To share some of the resources I've been using, as a total beginner on AI, I have selected my five favourite tutorials from last week which you can learn from if you are also a Noob or maybe refresh yourself if you've not used a range of tools it has for a while.

5 Adobe Illustrator Tutorials for Beginners

How to Create a Cute Bunny Vector Character


This tutorial shows you how you can take some really basic shapes and transform them into a cute little bunny. This lesson can provide you with a first step towards creating some original and unique characters of your own. To begin this tutorial visit: http://vector.tutsplus.com/tutorials/illustration/how-to-create-a-cute-bunny-vector-character/.

Create a Rolling Stones Style Mouth n Tongue

This tutorial takes hand drawings into account, as your first step is to scan in your drawing from paper to digitise it. This is exactly the kind of stuff I'm looking to do so open your eyes to this one and learn how to make your own cool Rolling Stones style graphic. Have a read of this tutorial at: http://blog.spoongraphics.co.uk/tutorials/create-a-rolling-stones-inspired-tongue-illustration.

Thug Bunny Symetry Tutorial

Learn how to create illustrations with symmetry in the simplest way possible in this tutorial. The bunny looks pretty awesome. I promise this addition is not just because I like bunnies as I noticed the first tutorial is of a bunny. This one is more about learning how to make your design more symmetrical. Read how to do it at: http://illustrationclass.com/2008/07/07/thug-bunny/.

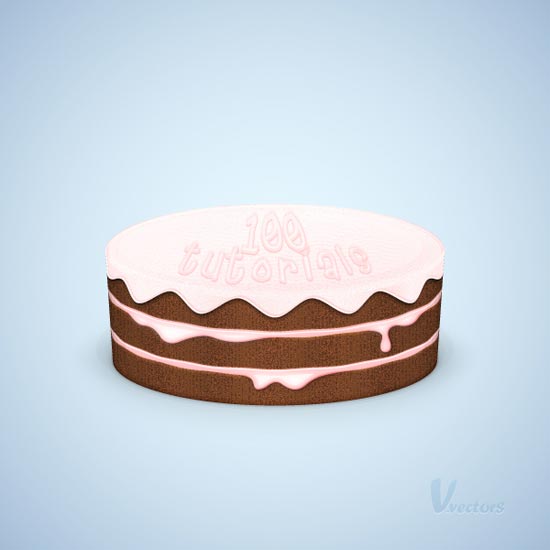
Making a Cake Illustration


Nearly as good looking as the real thing, this tutorial teaches you how to make a tasty looking treat. Moving through a range of different tools this one takes you into a 3D element of illustration. Try this tutorial at: http://vector.tutsplus.com/tutorials/illustration/how-to-create-a-detailed-cake-illustration/.

Create a Vintage Badge

I turned to this tutorial because I'm going to look for an interesting way to brand my work with a logo or stamp of some kind. This vintage style appealed to me the most which could also be of interest to you if you're looking to sign off your work somehow. Find out how to make this vintage badge at: http://abduzeedo.com/vintage-badge-illustrator-and-photoshop.

That's all for now. I hope you find some inspiration in these tutorials as well as learn how to transfer your paper makings into graphic designs. Good luck and have fun the same way I have. Just be patient.

13 September 2012

How to Photograph People Jumping

Image Credit
Quite some while ago I had fun with some friends and my DSLR when we jumped into swimming pools, on a bouncy castle, and even off a tree in the park. The classic shot was "the superman" as the shots we were trying to get made us look like we were levitating with ease. It was fun but believe me, knowing that there was a soft landing below definitely helped get some confident shots.

This is just one of the fun ways you can enjoy the benefits of high speed photography and probably one of the most used, however, its been used mainly in sport to get that perfect action shot from football to horse eventing.

We're going to look at how you can use your DSLR to get a cool photo of your friends or family doing some kind of cool jump mid-air.

DSLR Camera

Incase you didn't know, DSLR stands for Digital Single Lens Reflex. It's basically what the 'professionals' use in the photography world and generally the higher the price the more you get. If you don't have a DSLR you might not gain the same results but some cameras have a sports mode or the option to increase the shutter speed. These might also be able to get these types of photos but might be slightly delayed on the trigger. Personally, we'd recommend getting your hands on a DSLR. The photo below is the one we use.

Image Credit

Camera Settings For Jump

To gain a pixel sharp image you'll find there will be a lot of trial and error involved, however, the main thing to remember is that you need a high shutter speed. The Canon 1000D goes up to 1/4000 which is pretty fast. The problem though is the higher you go the less light you allow the camera to capture and compose a nicely balanced image from. Therefore, you need to adjust the amount of aperture too allow more light through the lens whilst you're taking these high speed photos. The lowest allowed on our camera s F4.0 - the higher this number goes the less light you allow in through the lens.
Image Credit
If you find that you're still getting low light images then you'll want to bump up the ISO on your camera. Ours goes up to 1600. What this does is it allows you to increase the sensitivity of the camera's sensor to light. Be warned though. The higher you go, the more grain your image can get. If you shoot your photos in RAW though you can edit this out in Photoshop to some level.

Image Credit
Overall, it's all about balance as different lighting conditions will alter your ability to shoot at high speeds as well as the capabilities of your camera and even your lens. Some lenses allow more light to reach the sensor meaning a lower F-stop number and personally we'd recommend fixed lenses for really sharp images as there's no moving mechanism for the zoom function.

A good gauge to start from would be the following:
  • shutter speed 1/250
  • aperture F5.6
  • ISO 800
From here you can adjust accordingly to the images you're shooting.

We hope this has been a helpful cheat sheet to taking high speed photos of people jumping. If you feel like you have more to add to this please leave a comment. Otherwise, happy shooting!

For further help with photography tips, take a look at our previous article on photography tips which has our helpful guide to how shutter speeds, apertures, and ISOs work: http://www.inspiringprint.blogspot.co.uk/2012/08/newbie-photographer-resources-and-advice.html.

2 August 2012

Newbie Photographer Resources and Advice

Prior to this blog I was a photographer for a small nightclub in the London area and it taught me a lot about how to use my Canon 1000D SLR in low lighting to get some really cool shots (with the aid of a flashgun of course).

As well as trial and error I searched the web for advice and tutorials on how to use my SLR camera effectively to create impressive photos that patrons of the club would want to use and share. This lead to the discovery of multiple blogs, infographics and video tutorials which I'd like to share with you awesome readers in this blog post. Just keep in mind that when I started my photography job I was a noob so some of this information might not be of interested to advanced SLR users, however, it's always good to go back to the basics every now and then.

The Photography Cheat Sheet

This is a recent infographic that I stumbled upon by Miguel Gantioqui which explains the basic settings of SLRs and the effect it will have on the image you shoot. This is a great resource for SLR owners who are deciding to use the manual settings of the camera for the first time. More experienced users will understand that it is a balance of the different functions within this infographic that contribute to the quality/ style of image you want to produce. Therefore, for the noobs out there, don't stick to just modifying one setting. Play around.


http://miguelinclosedcaption.tumblr.com/post/3526501838/infographic-poster-2-photography-cheat-sheet

YouTube Channels for Video Tutorials

Like anyone else looking on how to do stuff, I YouTubed it. So rather than having you waste your time looking for the decent quality channels on photography I'm going to give you a quick list of the ones I'd recommend:
Short list right? If anyone has any other channels they'd recommend or individual videos they rate highly for noob SLR photographers then please add then to the comments section of this post. After all it's all about learning right?

Photography Forums

There's a lot of value to be gained from becomming a member of online communities as you can get honest feedback and advice from a broad spectrum of users, from noob to expert. There are a couple that I checked out which were pretty good reads so if you feel like it sign up to them and get asking. If not just have a read of the stuff they're talking about, you'll learn quite a bit this way.

The forums I took at look at were:
If anyone has a range of forums they checked out when they were starting out/ that they are still a member of, please feel free to add your suggestions in the comments section below.

That's all for now...

I hope you've found some use in the resoureces that I've provided above. I hope new users of SLRs can learn a whole lot from this and then go on to adapt these teachings to find their own methods. Don't forget the value in post-production as photo editing software such as Photoshop can add a whole other dimension to your images. I'll discuss this in another blog article some other day. Happy learning!

Share This Page